
As the last traces of winter fade away and the first hints of spring emerge, there’s something incredibly satisfying about giving your home a thorough refresh. Spring cleaning isn’t just about dusting off shelves or mopping floors—it’s a ritual that helps us transition between seasons, clearing out the old to make way for the new. It’s about creating spaces that energize and inspire us as the world outside bursts into bloom.
But let’s be honest: tackling your entire home can feel overwhelming. Where do you start? What areas need the most attention? How do you ensure you’re not missing important tasks? That’s exactly why we’ve created this comprehensive spring cleaning checklist. We’ve broken down every nook and cranny you might overlook, making it easy to transform your home one manageable step at a time.
Whether you’re a cleaning enthusiast who looks forward to this annual ritual or someone who approaches it with a bit of dread, this guide will help you refresh your space efficiently and effectively. We’ve organized everything by zones—from outdoor spaces to indoor rooms—so you can tackle the project at your own pace, celebrating small victories along the way.
So open the windows, let in that fresh spring air, and get ready to fall in love with your home all over again.
Outdoor Spaces: Preparing for Enjoyment

Spring is the perfect time to revitalize your outdoor areas after months of winter neglect. Creating inviting outdoor spaces isn’t just about aesthetics—it’s about extending your living area and reconnecting with nature after the long indoor months.
Your Outdoor Checklist:
- Clear winter debris: Start with a clean slate by raking leaves, removing dead plants, and clearing gutters of accumulated debris. This not only improves appearance but prevents potential drainage issues and creates space for new growth.
- Inspect and repair: Take a close look at fences, decks, and outdoor structures for winter damage. Replace loose boards, hammer in protruding nails, and consider applying a fresh coat of weather-resistant stain or paint to wooden elements that show signs of weathering.
- Power wash hardscapes: Rent a power washer for a day to blast away months of grime from patios, walkways, and outdoor furniture. You’ll be amazed at how much brighter these surfaces look when layers of dirt are removed—it’s like giving your outdoor spaces an instant facelift!
- Create zones for activities: Think about how you want to use your outdoor space and arrange furniture accordingly. Perhaps you need a dining area for al fresco meals, a lounging space for reading, and a play zone for kids or pets. Clearly defined areas make the space more functional and inviting.
- Plant strategically: Choose plants that offer continuous blooms throughout the season rather than varieties that peak all at once. Consider a mix of perennials for long-term interest and annuals for immediate color. Native plants require less maintenance and support local pollinators—a win-win!
- Implement smart lighting: Solar-powered pathway lights are inexpensive, easy to install, and provide both safety and ambiance. String lights draped across seating areas create a magical atmosphere for evening gatherings, extending the usability of your outdoor space well into the night.
- Prep for outdoor cooking: Clean your grill thoroughly, check propane levels or stock up on charcoal, and organize your outdoor cooking tools. Creating an efficient outdoor cooking station now means more spontaneous outdoor dinners when the weather is perfect.
Pro Tip: Create an outdoor storage solution for frequently used items like cushions, toys, and garden tools. Weather-resistant deck boxes or a small shed can keep everything organized and protected, reducing the constant back-and-forth to your garage or home.
Laundry Room Refresh: Organizing and Restocking
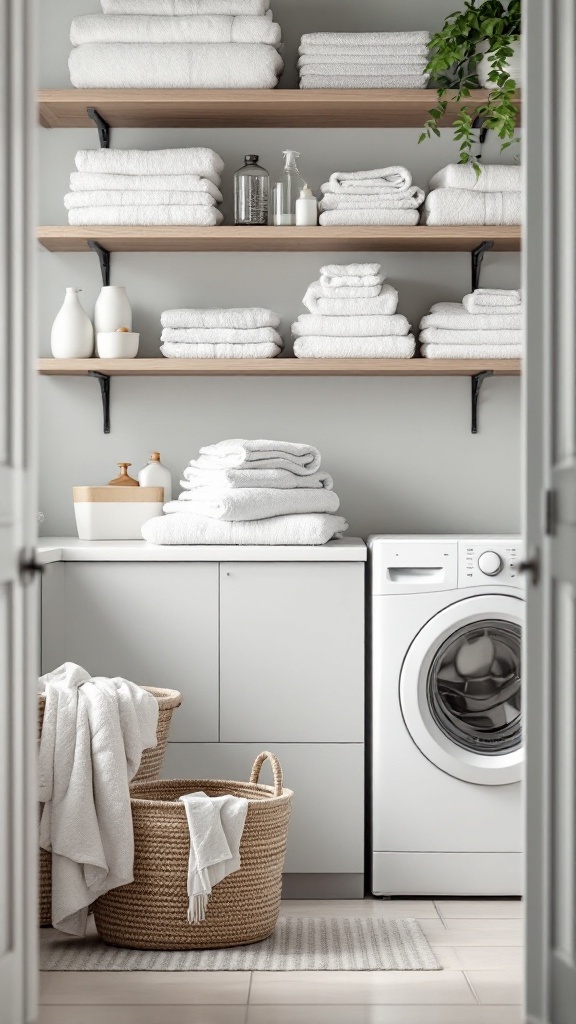
The laundry room—often a small space with a big job—deserves special attention during your spring cleaning. An organized laundry area not only makes weekly chores more pleasant but can actually improve your laundry results and protect your clothing investment.
Your Laundry Room Checklist:
- Deep clean appliances: Pull out your washer and dryer to vacuum behind and underneath (you might be shocked at what you find!). Run an empty hot water cycle with vinegar or a specialized washing machine cleaner to eliminate odor-causing buildup and mineral deposits. Clean your dryer’s lint trap thoroughly and consider having your vents professionally cleaned—this prevents fire hazards and improves efficiency.
- Evaluate and organize products: Take inventory of your laundry supplies. Dispose of nearly-empty bottles and products you don’t use. Group similar items together—stain removers in one container, everyday detergents in another—for easy access. Consider transferring powders and liquids to clear containers with labels for a more uniform, appealing look.
- Implement a sorting system: Invest in labeled hampers or baskets that pre-sort laundry (lights, darks, delicates, towels) to streamline wash day. If space is tight, stackable bins or a rolling cart with multiple baskets can maximize vertical space while keeping everything organized.
- Create an ironing/folding station: Designate a clean, flat surface for folding clothes immediately after drying (this prevents wrinkles!). If you iron regularly, consider installing a wall-mounted ironing board that folds away when not in use, or a pull-out drawer with a built-in ironing surface.
- Address efficiency issues: Check for any water leaks and ensure proper drainage. Examine hoses for cracks or wear—replacing them every 3-5 years is recommended to prevent flooding. Level your washer if it’s vibrating excessively during cycles.
- Add practical touches: Install hooks for hanging items that need air drying. A small tension rod creates space for hanging shirts straight from the dryer. Consider adding a small countertop or shelf for folding and a drawer for storing small items like buttons, safety pins, and clothing repair supplies.
Deep Cleaning Surfaces: Beyond the Basics

Surface cleaning is where the true transformation of spring cleaning happens. While regular maintenance keeps things presentable, deep cleaning tackles the built-up grime that accumulates in the less obvious places. This section focuses on thorough techniques that reach beyond your normal cleaning routine.
Your Deep Cleaning Checklist:
- Create a systematic approach: Work top to bottom in each room (dust ceiling fans and high shelves before tackling floors) and left to right (to ensure you don’t miss spots). This methodical approach is more efficient and thorough than random cleaning.
- Address overlooked high surfaces: Use an extendable duster to clean ceiling corners, light fixtures, door frames, and cabinet tops. These areas collect surprising amounts of dust that eventually falls to more visible surfaces.
- Tackle grout renewal: Kitchen and bathroom grout can become discolored over time. Make a paste of baking soda and hydrogen peroxide, apply to grout lines with an old toothbrush, let sit for 10 minutes, then scrub and rinse. For stubborn stains, consider a specialized grout cleaner with a small brush attachment.
- Refresh mattresses and upholstery: Vacuum your mattress thoroughly using your machine’s upholstery attachment. Spot clean stains with appropriate cleaners, then deodorize by sprinkling baking soda over the surface, letting it sit for several hours, and vacuuming again. Apply the same technique to sofas and upholstered chairs.
- Clean behind and under appliances: Pull refrigerators, stoves, and other large appliances away from walls to clean accumulated dust and food particles. This not only improves appearance but prevents pest issues and can increase appliance efficiency and lifespan.
- Wash walls and baseboards: Walls collect more dust, oils, and residue than we realize. Use a microfiber mop or cloth with an appropriate cleaner for your wall type. Pay special attention to areas around light switches, door handles, and hallways where hands frequently touch surfaces.
- Sanitize high-touch areas: Doorknobs, light switches, remote controls, cabinet handles, and electronics harbor germs. Use appropriate disinfectants that won’t damage these surfaces but will eliminate bacteria and viruses effectively.
Decluttering Each Room: A Systematic Approach

Decluttering isn’t just about creating physical space—it’s about creating mental space as well. Each item in your home requires some level of attention, whether it’s cleaning, maintaining, or simply deciding where to keep it. By thoughtfully reducing what you don’t need, you create more time and energy to enjoy what truly matters.
Your Decluttering Checklist:
- Set clear intentions: Before starting each room, define what success looks like. Is it about creating more usable space? Making your home easier to clean? Finding items more quickly? Having a clear purpose makes decision-making easier throughout the process.
- Use the four-box method: In each room, set up four containers labeled: Keep, Donate, Store, and Discard. The “Keep” box is for items used regularly that belong in this room. “Donate” is for useful items in good condition that you no longer need. “Store” is for seasonal or occasionally used items. “Discard” is for broken or unusable items.
- Implement the one-year rule: If you haven’t used an item in the past year (excluding truly seasonal items or special occasion pieces), it’s a strong candidate for donation or disposal. Be honest with yourself about future use—”someday” rarely comes.
- Create homes for homeless items: Designate specific locations for items that tend to float around your home—mail, keys, children’s school papers, etc. Use attractive bins, hooks, or designated drawers to corral these items consistently.
- Digitize paper clutter: Scan important documents and set up a simple digital filing system. Shred and recycle paper you don’t need to keep as physical copies. For papers you must keep, create a labeled filing system that makes retrieval easy.
- Address sentimental items thoughtfully: Set aside a specific time to sort through sentimental items rather than mixing them with regular decluttering. Consider keeping a representative sample rather than every item—one child’s drawing rather than dozens, for example.
- Implement maintenance systems: In each room, create simple systems that prevent future clutter accumulation. Examples include a “one in, one out” rule for clothing, a mail processing station near your entrance, or weekly “reset” sessions where everything returns to its proper place.
Seasonal Maintenance: Addressing Repairs and Updates

Seasonal maintenance isn’t just about fixing what’s broken—it’s preventative care that saves you time, money, and stress down the road. Spring is the ideal time to address issues that may have developed during winter and prepare your home for the warmer months ahead.
Your Seasonal Maintenance Checklist:
- Inspect and clean HVAC systems: Replace filters in your heating and cooling systems. Consider having your air conditioning serviced before summer demand creates longer wait times. Clean air vents and returns throughout your home to improve air quality and efficiency.
- Check for water damage: Examine ceilings, basements, and crawl spaces for signs of water intrusion that may have occurred during winter thaws or spring rains. Address any issues immediately to prevent mold growth and structural damage.
- Test safety devices: Replace batteries in smoke detectors and carbon monoxide alarms. Test that they’re functioning properly. Check expiration dates on fire extinguishers and replace if needed. Update emergency kits with fresh supplies.
- Examine window and door seals: Winter can be hard on weatherstripping and seals. Look for gaps, cracks, or damaged areas around windows and doors. Repairing these now improves energy efficiency year-round and prevents pest intrusion.
- Inspect your roof: Look for missing or damaged shingles and signs of leaks. Spring is ideal for roof repairs, as temperatures are moderate for proper sealing and curing of materials. Consider professional inspection if your roof is aging or showing multiple issues.
- Address outdoor drainage: Clear downspouts and ensure they direct water away from your foundation. Adjust landscaping grade if water pools near your home. This simple maintenance prevents costly foundation and basement issues.
- Service outdoor equipment: Get lawnmowers, trimmers, and other seasonal equipment ready for use. Change oil, sharpen blades, and replace worn parts before you need them. Schedule professional service early before seasonal rushes.
Wrapping It Up
As you work through each section of this spring cleaning checklist, remember that the goal isn’t perfection—it’s progress. Each small task completed is a step toward a fresher, more functional home that supports your lifestyle and brings you joy. The beauty of a comprehensive approach is that you can tackle it at your own pace, celebrating victories along the way.
Spring cleaning is more than just a seasonal chore; it’s an opportunity to reset your relationship with your living space. As you clear away winter’s dust and clutter, you’re making room for new possibilities, creating spaces that inspire rather than overwhelm you. You’re not just cleaning a house—you’re crafting a home that nurtures your well-being throughout the coming seasons.
Consider taking before and after photos as you complete each section. These visual reminders of your accomplishments can be surprisingly motivating and satisfying. Share your progress with family members to encourage their participation and appreciation of the refreshed spaces.
Remember that maintaining your newly refreshed home doesn’t have to be overwhelming. Incorporating small daily habits—returning items to their homes, addressing messes promptly, and implementing the organizational systems you’ve created—will help preserve the results of your spring cleaning efforts long after the season has passed.
As spring unfolds into summer, take time to enjoy the fruits of your labor. Invite friends for a gathering in your revitalized outdoor space. Appreciate the ease of finding items in your organized laundry room. Notice how much more pleasant cooking feels in a deeply cleaned kitchen. These moments of appreciation make all your efforts worthwhile.
If you liked these ideas, make sure to follow our Pinterest for more!
Leave a Reply